

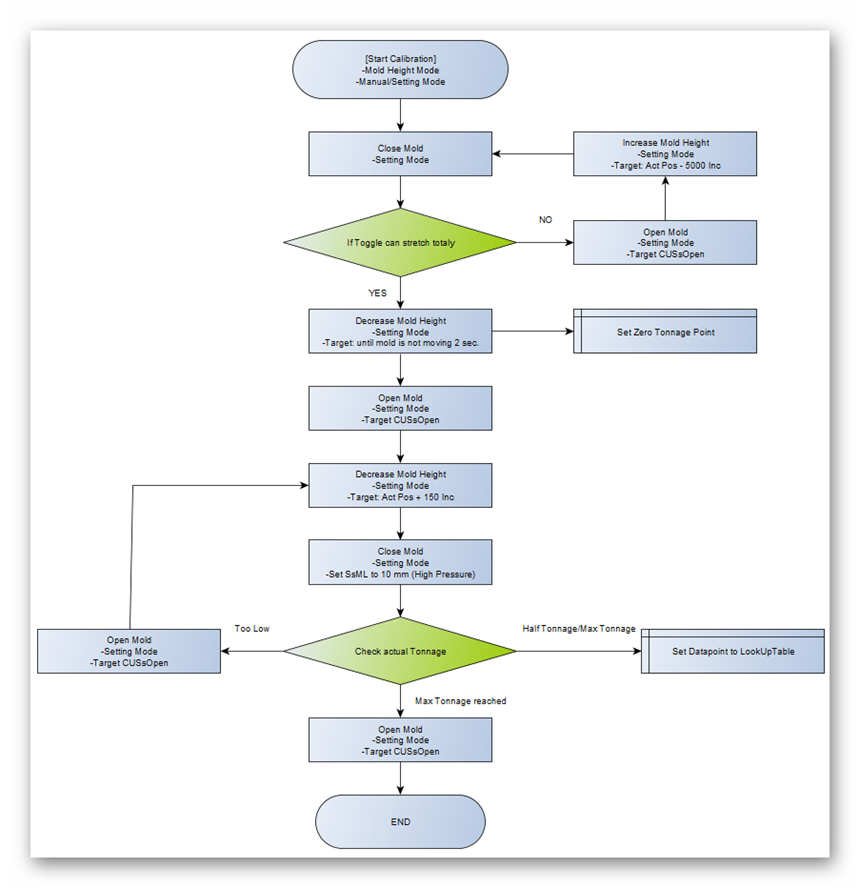
Calibration is needed to get the real distance between Zero tonnage point and Max tonnage point.
Calibration should be done in HQ with a dummy Mold.
After detecting Mold touch Point Mold height position will be increased by 150 inc. till max tonnage.
Zero Point, Middle tonnage Point and Max tonnage Point will be stored and used for the LookUpTable to get always the correct increase or decrease of the Mold Height position.
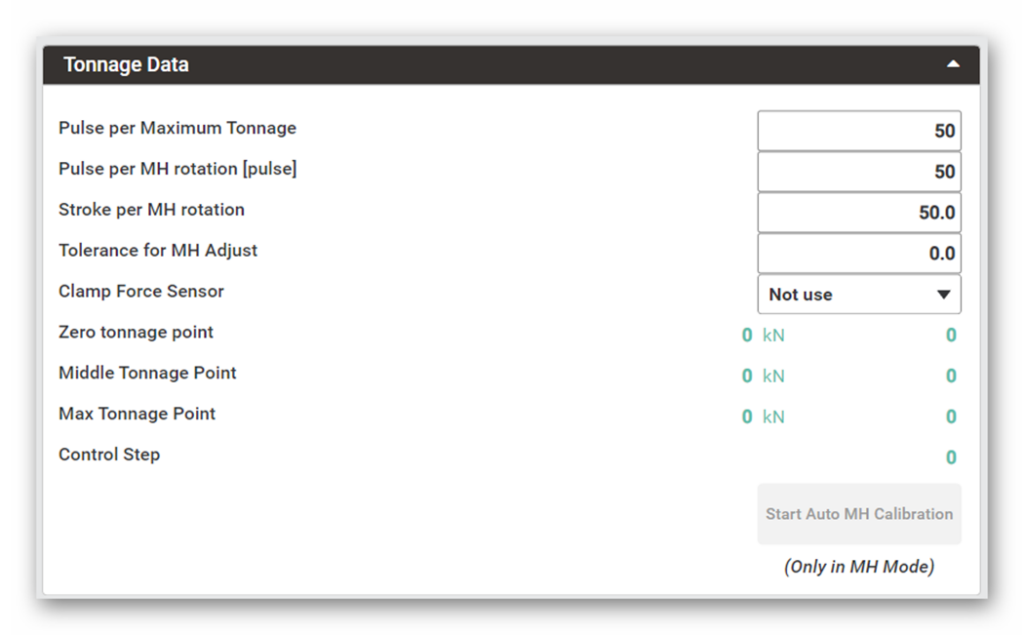
- Pulse per Maximum Tonnage: used just for monitor the Position but not for any calculation
- Pulse per MH rotation [pulse]: used just for monitor the Position but not for any calculation
- Stroke per MH rotation: used just for monitor the Position but not for any calculation
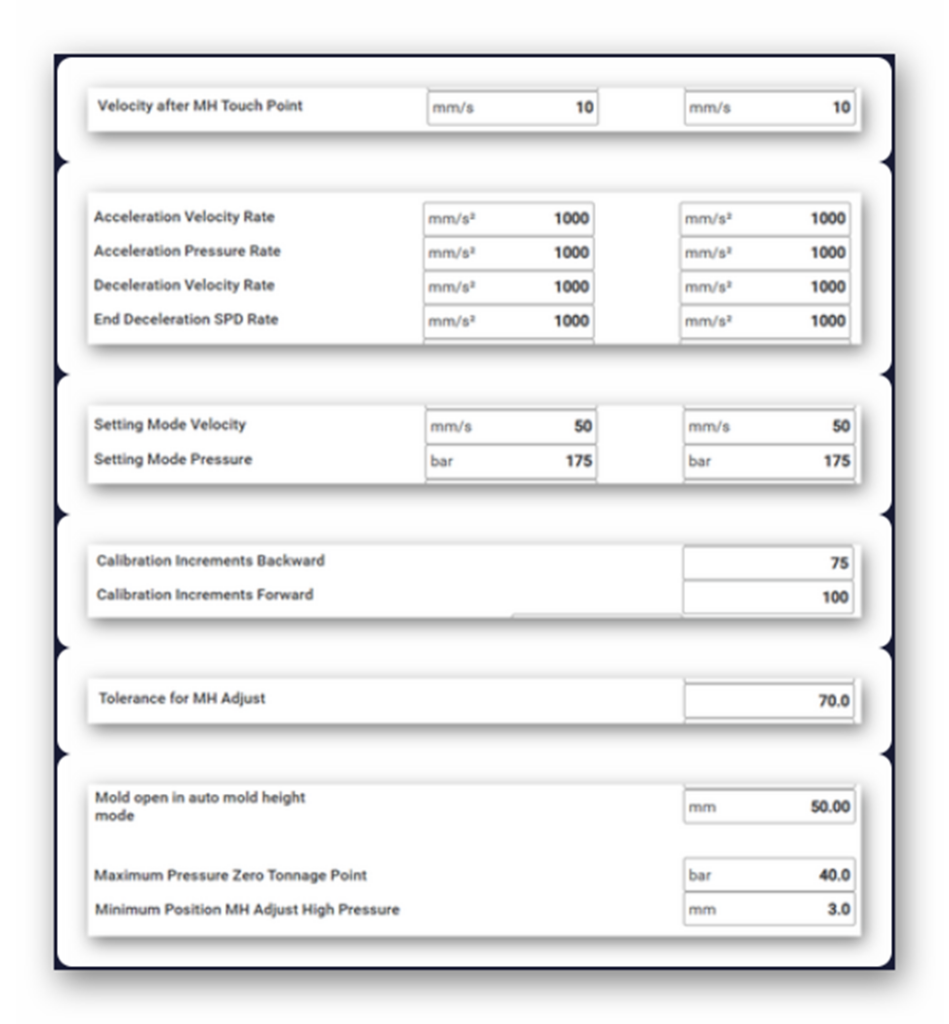
- Tolerance for MH Adjust: plus and minus tolerance for Automatic MH adjustment
- Clamp Force Sensor: Selection if Tonnage Sensor is used or not
- Zero Tonnage point: MH position of Mold Touch point
- Middle Tonnage Point: MH position of half tonnage
- Max Tonnage Point: MH position of maximal tonnage
- Control Step: show the Control step of the Calibration control for debugging
- (Button) Start Auto MH Calibration: only active if Mold Height Mode is active. Start the Calibration process and if the process is active the Button also can stop the process

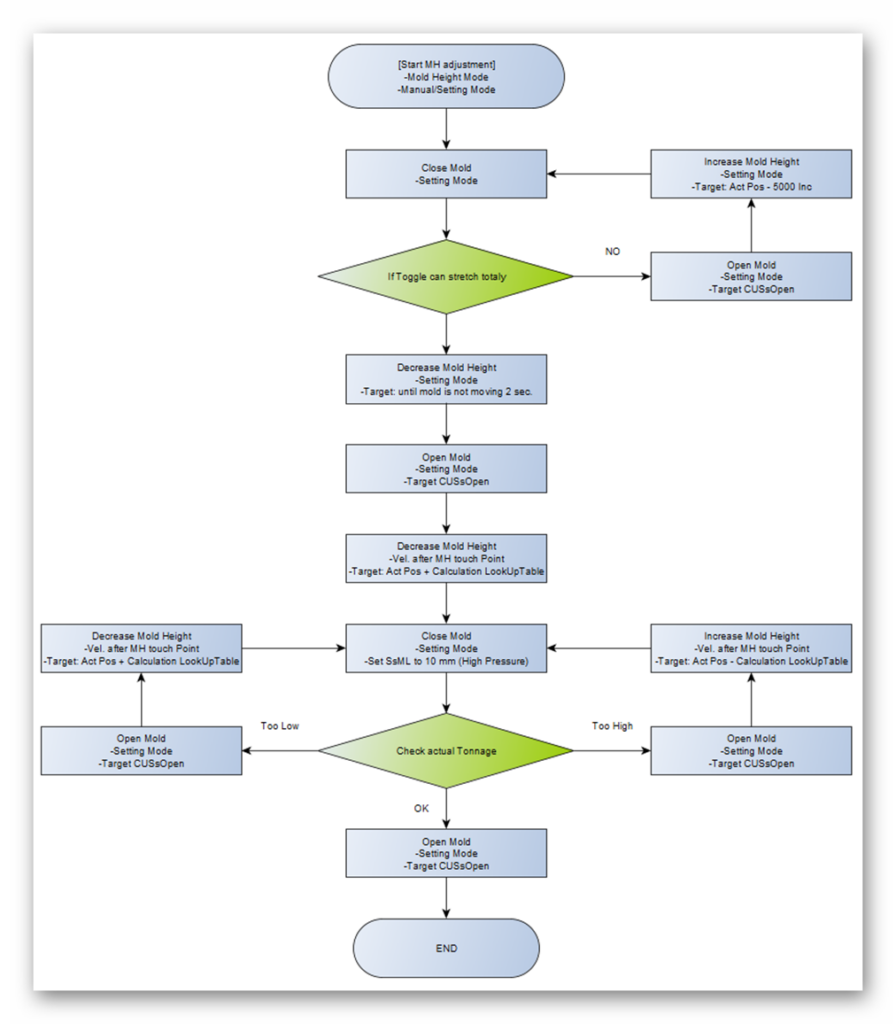
- Vel. After MH Touch Point: this Velocity is used for decreasing the Mold Height position after the Touch Point is detected

- Max Pressure Zero Tonnage Point: (used only without Sensor) Maximum allowed Pressure to detect the Zero Point

- At this Position the High Pressure built up will start during MH adjustment and calibration

- Everytime the Clamp opens to this position during MH adjustment and Calibration
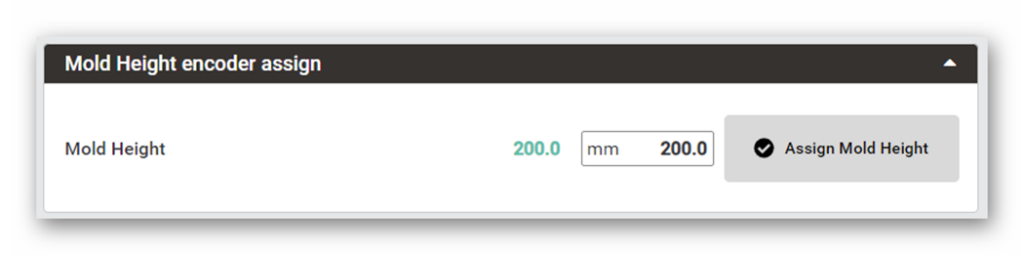
Take care the Mold height encode have the correct position.
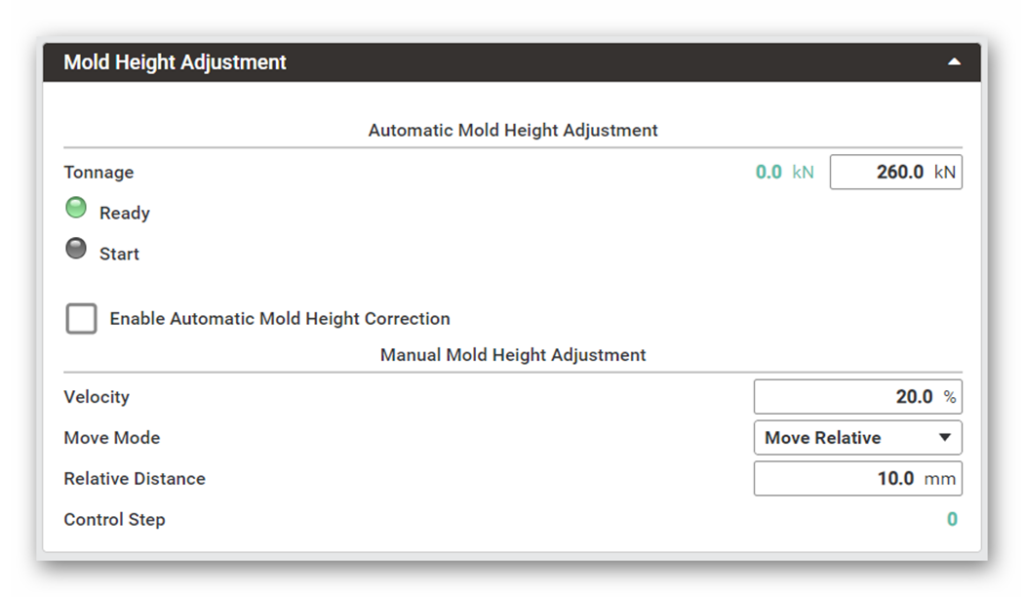
- Tonnage: Show the actual tonnage and the set tonnage
- Ready: Indicator for possibility to start the Automatic Mold Height adjustment
- Start: Indicator for Mold Height adjustment is active
- Checkbox Enable Automatic Mold Height Correction: Enable the Correction of Mold Height during Automatic Cycle at the end of Mold open Movement
- Velocity: Set Velocity for Manual Movement
- Move Mode: set Move Mode to Absolute Position or Relative position
- Relative Distance: Set Value for Relative Move Mode
- Control Step: Step of the Control (only shown in Setting mode for debugging)
This setting were working on a TH280A5 machine.
Settings for “Setting Mode Pressure”, “Setting Mode Velocity” and “Velocity after MH touch Point” might be different for other machine sizes.
- Footer Buttons
- A mold must be mounted.
- The motor must be switched on.
- All machine parameters must be set properly.
- Operation Mode: Manual or Setting Mode. If not, the start button is not active.
- Mold Height Mode must be activated. If not, the start button is not active.
- Mold should be in Open position
- No interlock case active. (Ejector, Core..), if the interlock is active, the process will be stopped with alarm.

In the Footer Area on the last Tab is the Start Button for the Automatic Mold Height adjustment.
If the last Tab is entered an Alarm will apper as information for the Mold Height Mode.

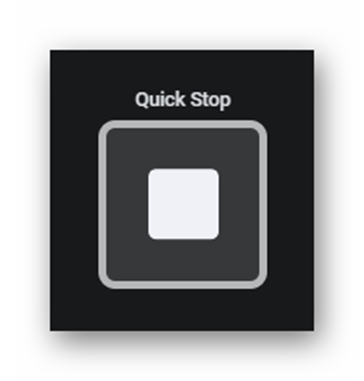
After Start of the Adjustment the Footer will change and this big Stop Button will appear.
With this Button you can stop immediately the process.